2002 IO 2ltr 4Door Greetings
Hi everyone, im Andrew
i bought myself a OI, its alright.
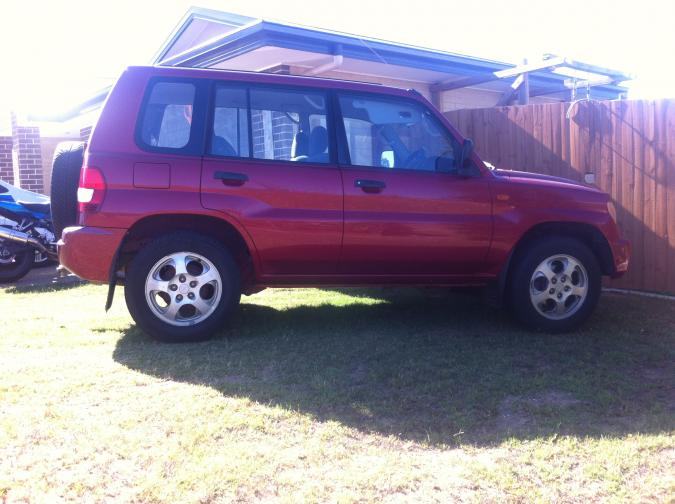
2ltr it has air bags in the back but from what i can tell its all stock springs and struts. can someone please confirm this from the pics?


ive built a back parcle area with a pull out cooking bench thats getting a sheet of thin stainless layed on it.


ive put a different head unit in with the standard speakers
yet to be build, roof racks, rear bumper , side steps, and modifying a aloy frount bumper. i will mark messuments for the projects incase people want to replicate. the rear bumper will be a piece of channel cut & bent then choped and a few bits added before re welded before painting. the side steps will be a piece of large thin pipe with a bend each end, 3 brackets droping down and out welding onto the side of the pipe with a peice of checker plate pop ribited on top for the step. roof racks: i already have a piece of channel installed ontop from previous owners must have had roof racks so im using them, 2 rectaingle box sectoins spaced prob 15cm maybe 20cm with aloy security screen base and sides. 3 flat bar runers with bolts welded on push up through the box section with a clamped washer and when tighting the flat bar raises and tightens secure. basicly red car with black and silver ie black painted steal with silver aloy checkerplate etc.
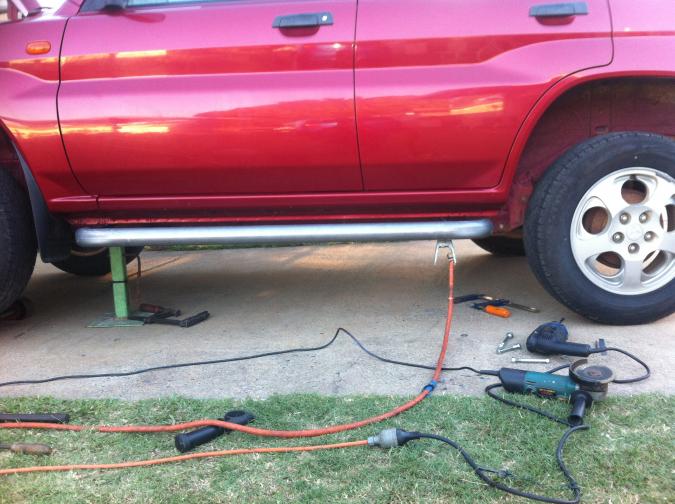
Clearince: my rear diff is 22cm from the ground, gearbox brace 21cm (WTFwhy is this so fucken huge!!!) < has anyone made there own smaller version? Front end 19cm.
this was not messured from flat ground but on a slight slope, but my clearence frount and back from the top of the tire to the lip of the gard is 11cm
im trying to hunt down some information, did a bit of looking on here but seams to be conflicting in some areas.
1, lift options: springs and struts. kyb struts and king springs > does this give you a 30mm lift http://www.ebay.com.au/itm/MITSUBISHI-PAJERO-IO-3-1999-9-2003-30MM-LIFT-KYB-SHOCKS-KING-SPRINGS-KIT-/360730761240?pt=AU_Car_Parts_Accessories&hash=item53fd3a9818&_uhb=1
2, read somewere about the triton, commodore and land cruzer bits being sutible, anyone have solid information on this, year models etc part no.?
3, standard offset of origanal rims?? stud = 5 x 114.3 x 6" wide. ive read 0, +15 and +35. can someone confirm? and is this messured from the back of the rim "where the stud holes are drilled to the outer lip of the rim???? for instance buy a set of sunraysia wheels 5 x 114.3 x 7 or 8" with an offset of +35 for 7" and +40 or +45 for 8" given the extra strain on the wheel berrings they would look fat.
4, optimum tire size for the standard 30mm lift. my io has 215 / 65 / 16.
5, has anyone marked out templates for the suspension spacers? and the maximum before you need to do a diff drop
6, diff breathers? any info on this?
any info would be great to clear this up and help me out.
Andrew
Congrats on the buy!
Nice tidy unit there!
Be carful of that gearbox crossmember...I almost destroyed mine beyond repair...lucky a vice and my trusty mig had it covered :P
I wouldn't make it any thinner. to raise it at all..I got a "belly plate" a bash plate that extends all the way to the gearbox crossmember so it just slides over most stuff. only problem is that weighs 25kg and I have put a few decent dents into it already.. (less than 4 months old)
Im also in the process of fabricating a rear tube bar as I also destroyed mine.. :P
Happy iO!
It may be a little more complex than that ...
hey mate, so to put a 7" rim you would need to have an offset of +48 to make enough clearence for the 1/2" it would push closer in the tire well yes? as the other 1/2" would be going out.
Going from a 6" rim to a 7" rim adds roughly 25mm to the rim width - with no change in offset the inner edge of the rim will move inwards by 12mm - this could be a problem on the front wheel - there's just about 10~12mm clearance to the strut, depending on your choice of tire - you may have to go to a rim with 46+12 or 58mm offset, doing this will move the outer edge outwards a full 25mm and on full lock this will bring the outer edge of the tire very close to the back of the arch - if you're going up on the tire size, this can further complicate it.
Sometimes using math is just step one, a test fitting has to be done.
does anyone have a before and
does anyone have a before and after pic of the kyb and king coil lift kit instalation with the standard tires?
does this kit "see ebay link above" also lift the back? the frount it lifted by the raised spring pan, does the back just have longer springs and more travel on the shocks? i would like to keep the air bags in the back and i tow the boat and box trailer around with the IO so having the extra load adjustment option is very handy.
touching on the spacers for this, does anyone have templates for the frount and back? i see a few people have done them but has anyone marked it out, scaned it in to the comp so people can print etc?
and from what i see a kyb and king coil lift kit plus spacers would then require a diff drop? is this tru or is there a max lift before a dif drop is required?
Happy IO :)

Hello, Here is a link to my
Hello,
Here is a link to my Build Thread.
http://www.pajerio.com/forum/glendons-io#comment-15616
I have posted the height difference between stock and KYB and King Springs. The stock spring is actully longer but softer. I tried using the KYB shock and old spring thinking that it would give some more lift, which at first did lift the car 15mm but then some sag set in over a few days and ended up much lower than the King Springs.
Cheers
GO-R

more answer
Yes the ebay kit lift the rear of the car.
No the spring is not longer and no it doesn't give you more travel, mainly because it is a firmer spring.
No the rear shock doesn't give you more travel it is the same as what you have.
You can keep the air bag, you might need an extra spacer for them to compensate for the lift, this will depend on the size of the air bag, it might be ok.
I don't remember seeing a rear template, I have seen some front one but I don't remember where! this said they are very basic and you could make one yourself.
We talk about max lift without the need of a diff drop, as soon as you lift the car you will increase the CV angle this in itself will work a bit more the CV, someone found that 45 mm is safe, other 50 mm a diff drop is needed (again from memory)
You wrote "the frount it lifted by the raised spring pan", no it isn't, the spring is different, I think that your strut (based on the year model of your car) is the same as the one on ebay.
I hope this help...
As always...I could be wrong, as my wife :)
Happy io
hello
Your questions in the first post
1, lift options: springs and struts. kyb struts and king springs > does this give you a 30mm lift http://www.ebay.com.au/itm/MITSUBISHI-PAJERO-IO-3-1999-9-2003-30MM-LIFT-KYB-SHOCKS-KING-SPRINGS-KIT-/360730761240?pt=AU_Car_Parts_Accessories&hash=item53fd3a9818&_uhb=1
2, read somewere about the triton, commodore and land cruzer bits being sutible, anyone have solid information on this, year models etc part no.?
3, standard offset of origanal rims?? stud = 5 x 114.3 x 6" wide. ive read 0, +15 and +35. can someone confirm? and is this messured from the back of the rim "where the stud holes are drilled to the outer lip of the rim???? for instance buy a set of sunraysia wheels 5 x 114.3 x 7 or 8" with an offset of +35 for 7" and +40 or +45 for 8" given the extra strain on the wheel berrings they would look fat.
4, optimum tire size for the standard 30mm lift. my io has 215 / 65 / 16.
5, has anyone marked out templates for the suspension spacers? and the maximum before you need to do a diff drop
6, diff breathers? any info on this?
any info would be great to clear this up and help me out.
Andrew
Hello Andrew
Yes you will find contradictory post ! mainly because it is just a forum (not Wikipedia!) people may have different point of view, understanding, likes and needs. Because the io is not at every corner and remain a not common car, this site is the only place in Australia where we talk about it and tried different mods, lots have been discovered as time goes by (more for the suspension than any other fields) and some error have been made along the way. This said complete safe and legal suspension kit is now available (only recently on ebay) because of what have been discovered here and because of action by some member to make it happen.
1, yes around 30 mm lift, based on the original new setting, so if you have sagging spring, you may have more lift.
2, Not sure about the triton, for the Landcruiser, from memory "Singlecell" built thread mention a rear spring spacer from a Landcruiser with a ebay link.
3, +46 on the io, again Singlecell have a different offset rim with some 245/75/16, more info on his thread.
4, Hum, the optimum tire size are the one fitted originally on the car :), this said I have 225/75/16 (a few other have those too) on the original rim. This have some advantages but some bad as well. You cannot win in "4x4 performance" and "on road handling" at the same time. 225/75/16 could be illegal on this car (they are where I am). Some other member have 245/75/16, some (oversea) even bigger. Some have different size like Natsterrr, check his thread.
5, For the rear, not that I remember, for the front, I think that some are around (not sure where!), but it is a very basic spacer.
6, I don't think that anyone have them, they are on my to do list but so far they aren't done.
hi, thanks for everyones
hi,
thanks for everyones input, much appreciated.
ive got 2 sets of rims today to try on, check out the offset etc, "i can get heaps of different rims to try through my brother"
atm ive got a 16" suzuki vitara new style rim they are 6 1/2 inch wide. and what we think is a ford teritory or a ba falcon, they have a sweet offset and look around 8" wide.
if the sping is no longer in the back the air bags should go in without any spacers. i pumped them up today WOW jacked the f&*k out of the back!!!! lol its sitting 23cm above the standard tire now, feels like your going to fall out of the chair. mind you i think the frount suspenshion is fair shaged.
welcome
You're welcome....regarding the rear spring and the air bag (I have them too ), what I mean by not being longer is that the wheel travel won't increase. This said they will still give you a lift. Your air bag will give you the existing amount of lift less the amount of lift given by your new spring. If you get 80 mm now with the air bag, once you lift your car by 30 mm, your air bag will then give you only 50 mm lift (80 - 30).....sorry I hope I am not too confusing !!
Don't drive with the air bag fully inflated, the car handling will be dangerous. I found that you have to play with the pressure to find the best one while towing, too much or too little aren't the best. I have some picture in my built thread.
I will follow your finding with the different fitting of wheel.
Happy io

7" rim - correct offset +34.1ish
Hi,
rim offset always creates some confusion.
With modern rims, the offset measurment is displaying the distance the mounting face of the rim (part that contacts the hub) is from the center line of the rim (mid point between inner and outer rim lips) in millimeters. If the mounting face is towards the outside of the rim it is positive, if it is towards the inside it is neagative.
e.g. +46 means the mounting face is 46mm towards the outside of the rim from the centerline.
standard io rims in australia are +48mm for the 3 spoke ZR model or +46mm for the 5 spoke standard model and 6" wide (154mm) while a 7" rim is 177.8mm wide
This means that if the 6" and 7" had the same offset you would have an extra 11.9mm ( (177.8-154)/2) ) out each side of the 7" rim compared to 6" rim.
To keep the inside edge of the 7" rim at the same position of the 6" rim so it won't hit your chasis etc you need to move the offset by 11.9mm
This results in +46 - 11.9 = +34.1mm offset
I run 6.5" rims and a +38 offset. (Mitsu FTO lightweights) but outlandr rims are often this offset
Iif you look at Mitsu outlander rims, they have a 6" with +46, a 6.5" with +38 and some verada magna's have a 7" with +34 but are rare
issues with using offset rims:
if your rims are offset outwards a lot more than standard they can cause the steering to tug and will wear the rack prematuerly, they also will affect the steering geometry as you corner and can result in the wheel pulling away from you in tight turns, it also puts more impact and tortional load on the wheel bearings.
Most modern cars "balance" the hubs such that the center line of the wheel passes through the center of the wheel bearing so it doesn't load the outside or inside of the bearing unevenly. the steering geometry also relies on the pivots of the hub to be balanced with the wheel drag which is along the center line of the rim - the hub pivots are typically inboard from this line to give some, but not too much feel into the wheel.
Guys in Greece run 7" rims without issue and you run more of a risk in hub bearing failure due to mud exposure than offset rims, but if you do a lot of highway kms keep the wheel tug in mind.
just a quick thought, if your
just a quick thought, if your going to keep the same or close to the standard 6" tire, not go up to 7 or 8" etc, but just want to change the rim etc, ie try a shit load of rims with no tires from the reckers. could you not just pop off the spair and see if the different rim fits there?
also has anyone gone to a 17 or 18" rim with a normal profile? is this a option to getting a large pofile tire, pros and cons? most of the $$ goes into the profile no?
thanks Andy

Another option
I went for 16x7" Mazda tribute alloys - $90 for 5 of them. Offset is about the same as stock so its 12mm further into the strut and 12mm further out towards the arch.
Check it out here: http://www.pajerio.com/forum/mazda-tribute-wheels
Instead of 225/75R16's which many people have here, I got 205/80R16 mud terrain tyres for $195 each (2 years ago now).
Both of these tyres have a 29" diameter, but mine are slightly slimmer meaning that there is no rubbing at all.
My track is still wider than standard, and larger diameter means far better off road ability.
The reason you want a larger side-wall on the tyre is to let more of the tyre balloon out when you air down for off roading. If anything, you want to go down a rim size and up a side-wall size to allow for better traction off road. The light weight of our cars means that I can run mine down to around 14PSI for general off roading, even for rocky sections, they work well.
The main measurements to look for with wheels that fit is the firstly the Pitch Circle Diameter (PCD), and the hub diameter.
The iO PCD is 5 x 114.3, and the hub is 67mm.
Suzuki's won't fit as they have larger hubs.
Toyota's won't fit (rav 4 have smaller hubs)
Falcon wheels are a chance.
I just found the other post with a lot more info: http://www.pajerio.com/forum/fantastic-discovery-hub-bore-and-offset
All the best.
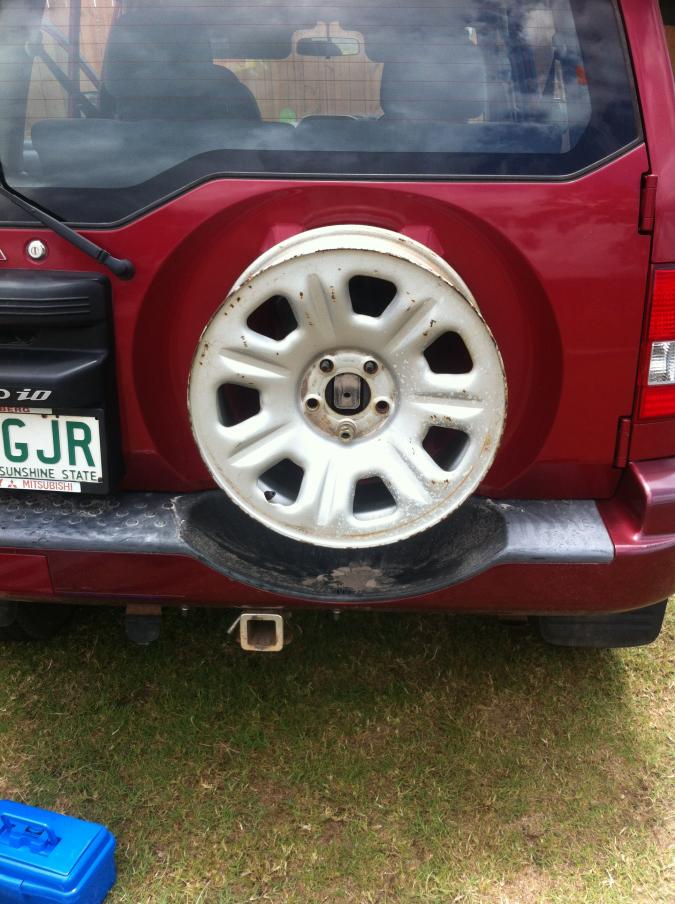
ok so i tried the suzuki rim
ok so i tried the suzuki rim on despite being advised it would not fit lol, and it almost fit, i just thought i would give them a go anyway as they were off a new style suzuki. we bought them for a older suzuki grand vitira but there different and do not fit on the old models.


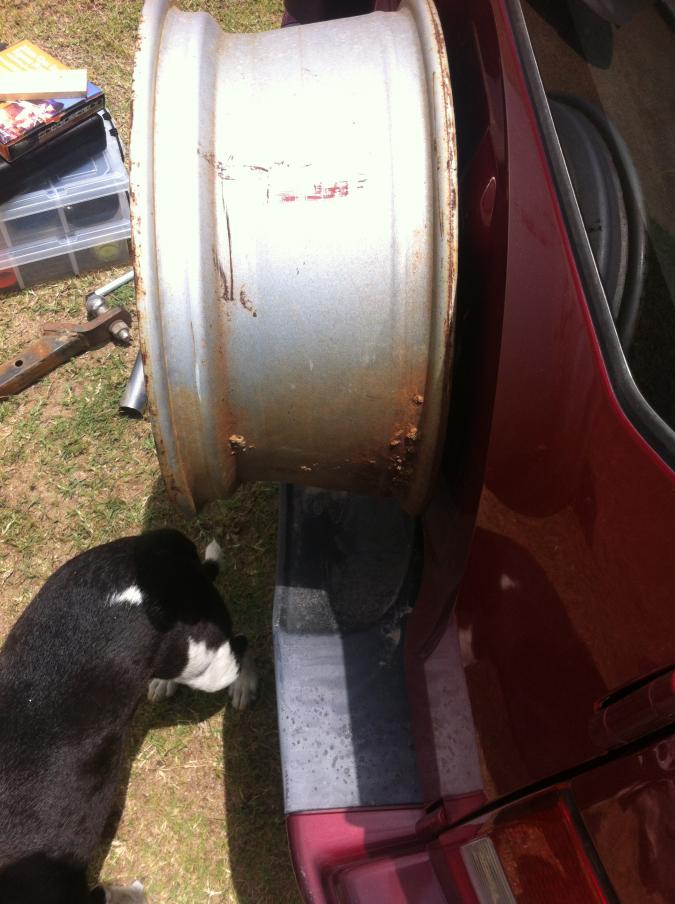
can this be machined out? it needs roughtly 1/2 mm taken off to slide on. tried it on the back spair holder first to see the offset if it would work.
tried the ford rim on to and it fits also. didnt try on the frount tho as im not ever going to use it but for someone wanting some fat rims cheep guess it could work lol.
they would proably look alright black or a gun mettal gray. dono why you would want to lower a IO but....
anyway, the general idea is black rims, ive seen the black rims on the 2 tone south african 2door, not a big fan of the standard rims black. want something with more of a lip deap dish kind something lol the suzuki rims slope in a bit once you take the cap out.much better looking with a tire on them then the standards i think.
whats ya thought??
Andy
Your choice entirely ...
can this be machined out? it needs roughtly 1/2 mm taken off to slide on.
It's a matter of personal preference - and you can machine either the rim or the hub.
Those rims, like most steel rims are lug centric (depend on the lug nuts to center them) so the size of the center hole is not critical - machining the lip away entirely will affect the stiffness of the rim marginally, but I wouldn't expect it to be a problem as long as the rim is bolted to a hub.
Think twice before machining the hubs - the OE alloy rims are hub centric and need that little ridge to locate them accurately.
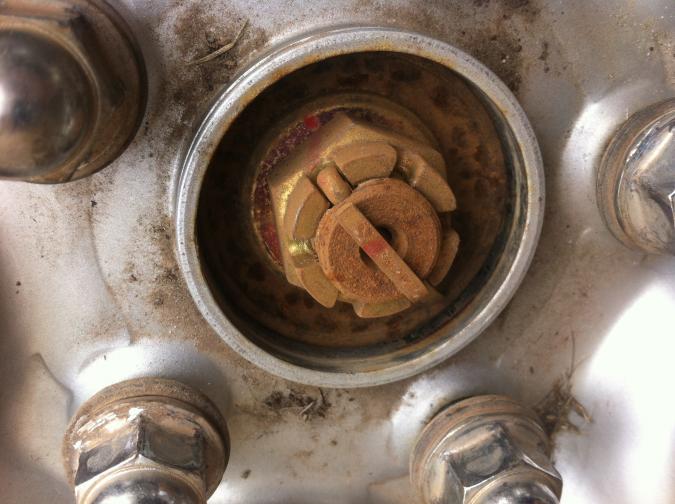
Just so that you know - your first picture shows your iO with the OE alloys, and the picture above shows what appear to be the OE lugnuts with the Suzuki rim - you cannot use those lug nuts with lug centric steel tims - they will not center the wheel correctly.
hi, Yer i would never
hi,
Yer i would never machine the hub. we have a tire changer so ill throw the tires i got on the rims for a while as there brand new.
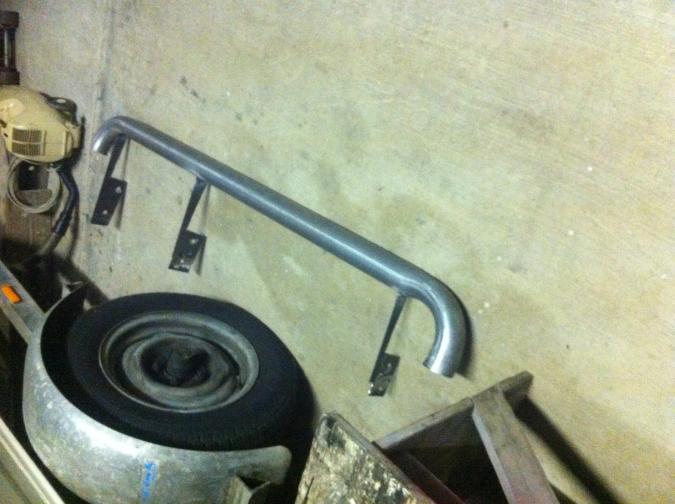
started the side steps today its a tube style with an aloy checker plate as the step,
cut cardboard templates, using 3m steel plate for the brackets, i pick them up on tuesday, had the exhaust shop bend me some 2 1/2" pipe up today.
its not designed for rock slidding so everyone calm down on the thickness of the tubeing lol
ill post some picks when i get a chance,


nice
Looking nice....plug the end to stop dirt filing in the tube. I would maybe weld a flat bar on the top of those bracket, they will be stronger but mainly because if for any reason the tube go up the bracket won't cut the lower seal of the car. (unless your top plate, to make the step, goes under the seal)
Happy io
its only part finished,
its only part finished, welding pipe ends to seal. and an aloy plate is going across and under the car body. little flat plates are being welded on for an extra pop ribet support.
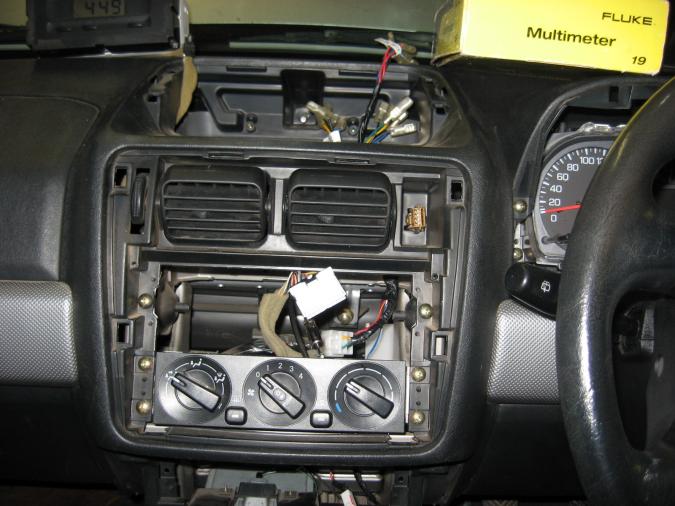
also anyone have issues with the cd player???????!!!!!!!!!!!!
when i put my new cd player in there was an extra wire going into the uni plug. it seams to be a relay for the right side parkers and dash light.
so... with out power, no right side parkers (only left) and no dash lights.
when connected to ignition wire form the cd player. turn the key. power comes on to the dash and the right side parkers. left comes on when you turn your parkers on.
so atm i have to drive around with my parkers on, untill i can figure out what this wire was for, an run a relay from the left side parker wire.
i pulled the plug from the left side parkers and ran a wire back to this random cd player wire and presto everything works how it should. but im not striping the wire in the engin bay to run a wire back into the dash,
how did the cd player know when to send power down this wire to the relay and have the parkers turn on with the left side?
assistance please...
stereo wiring
someone else has had this issue - problem is the power and accessory wires. from memory they appear to be around the wrong way but when you check the wiring diagram they are correct.
I would check the power and acc wires in and make sure you have not got them reversed. my stereo has power, acc and mem as power inputs
hey mate, no there connected
hey mate,
no there connected properly. i even tested them with a volt meter last night to see if there is a change in voltage when the parkers were switched on,
this wire is seperate to the acc and constant power. its part of the wiering harnes from the old cd player. it went into the cd player.
if it was a iluminating wire, then power would run through it when the parkers were switched on. but no power comes through it.
you have to send power back through it to activate the right side of the parkers.
this means the cd player had to know "somehow" when the parkers were turned on so it would send power back down this wire to the relay.
SERIOUSLY!!! how!!! i tested the voltage of the acc and the constant power and no change in volatage. how does it work...
the original cd player had a security light on it. blinks etc no code no music.
the only think i can think to do is find the right side parker wire and run a bridge of it back to the dash wire so it turms on.

wire colour
I don't have much knowledge in electrical, and I had to search a bit to find it but this wire is definitely for the light.
http://pajerio.com/forum/head-unit-installation post 6 and 8
Again, I am no sparky, far from that !! From what you wrote as you don't have power to this cable when the parkers were switches on, and that maybe the cd player would send power back.....You may just have the relay (or other) that is suppose to send power to the parker (and the cd player) faulty.
One sure thing is that wire is the illuminating one, and power should be there when the parker light are turn "on", may be you should start searching in that direction
I hope this help....
Happy io
hey mate, yer i found that
hey mate, yer i found that post. it doesnt help tho.
if it was just an illumination wire it wouldn't affect the parkers or dash light as it should be its own circuit, being connected or not if would not affect the operation of the dash nor parkers. you would simply cut, tape and forget.
it has to be something to do with the security feature of the head unit.
i would run a relay if i knew where the left side parker wire ran inside the dash. easier said then done tho. there are heaps of this same wire running everywere. also there is nothing that turns on when you switch the parkers on. so taking the operation off something else is a no go also.... i thought maybe just maybe the clock might illuminate when the parkers were switched on or the air con lights but no.
any wiering diagrams for the light setup?
other wise ill have to pull the casing off the stering and work back from the light switch test untill i get the seperated left side and bridge back.
can i just add.... what a STUPED f*&ken feature!!!!!
maybe, i think i might have
maybe, i think i might have something different happening tho. i wont say no to you inspecting more for me tho.
what do you have yours conected to?
after market cd players dont have iluminatiting wires, they just come on and stay on.
if the wire had power coming out of it, i could simply just ground it. to complete the circuit.
also can anyone tell me the difference between the 4door 2ltr 2002 and the ZR?
Depends on the unit
after market cd players dont have iluminatiting wires, they just come on and stay on.
Depends on the unit - the JVC I put in my daughter's car earlier this year connects to the dash lighting to dim the display at night.
if the wire had power coming out of it, i could simply just ground it. to complete the circuit.
THAT WILL blow a fuse somewhere - grounding a wire with power is not a good idea.
+1
+1 with Fordem, +1 with you...you do have another pb :)
Again, I have limited electrical knowledge.....I think that this green cable is just a feed from the parker light, nothing else, connected or not, your parker should work. You should disconnect completely your cd player, get your blinker fixed, then reconnect your cd player and see how it goes.
The io on the picture that you see the electrical out was without cd player for a while, the parker were working fine. Thinking that the cd player have some sort of internal connection to send power back to the parker doesn't seem right to me.
What you may have done is blow a fuse (or else) while working on the connection, and connecting this wire differently may send power (or earth) to your parker by a different way...The fuse for the light of the clock is under the bonnet next to the battery.
On the top of my head, the ZR have more option, different rim, ABS, passager air bag, rear spoiler, maybe a different inside (no fabric on the doors) colour coded bits and pieces, fog light, stickers ! and maybe something else....
I hope that's giving you food for thought :)
Happy io
yer, non of it makes any
yer, non of it makes any sence,
ive completly disconected the the cd player and tested the wire a bunch of ways. but thats the conclusion we found through elimination.
i checked the fuses but maybe i missed something, ill have another look over the fuses.
if a fuse was blown, even if power was sent back down the wire it shouldnt make any difference as it would not pass through the fuse to light anything up?
you get no power from the wire but if you send power back through it you get lights.
fordem, im not convinced your right, can someone clarify? with home electronics yes, + to ground will trip your fuse, but thats different. you have a + , - and ground.
if i take a + wire from the car connect a light bulb, + goes in and you ground the - .the curcuit is complete as the - of the battery conects to your car. its curcuit would have been complete through the cd players grounding. thats where my thinking was on it, did it need to be a complete curcuit?
im proably wrong but this is why we learn.
the point of reference to the after market cd players is that there not exactly designed to support illumination wires, like its a requirement wire to reconect when changing a standard cd player. ive replaced a lot of cd players in a lot of different cars and this is the first car ive came across that has a ilumination wire. didnt mean to say some after market cd players dont have this just that they generaly dont because it means nothing.
so no different in the engine or the suspencion diffs etc just some safety stuff and different trim
more info
Electrical fault don't always make sense unless you understand them :)
Ok, since my car is not yet on the road and I wanted to relocate my switches for my diff lock on the top of my clock, I started today. For the wire, what I can tell you is this, not maybe, not I think...100 % sure ! I disconnected the stereo, and the parker still worked perfectly. The green and white wire doesn't have power on it, once the parker are turn "on" this wire have power to it.
There is an electrical diagram somewhere in the manual, that may be handy to check....
How did your problem started ?
Almost forgot the ZR have twin turbo...lol...maybe not !!!
Happy io
it happened when i installed
it happened when i installed the new cd player.
i didnt have a diagram so i tested all wires to work out the speakers, power, acc etc this wire never had power so i never conected it to anything, drove to work, day time.... left night time. no dash lights... looked further no right parkers... but left were on.
first thing i checked was the fuses, then went back into the cd player and thats when i found this wire needed power sent through it for my dash lights to work....
ill check the fuses again. not sure how power would still get to the lights and dash if the fuse was blown tho.
thank heaps for all your help mate.
appreciate it
Andrew
All fixed. not going to
All fixed.
not going to believe it, but it was the fuse.
i checked over them when it first happened. must have missed it.
didnt think to check again as the fuse should not have been letting power back through it to the lights if it was blown,,,,thats what led me on the hunt for the problem.
it must have another curcuit that does not run through a fuse, that alows the lights to be powered through this ilumination wire if the fuse is blown.
cant really say i feel stuped tho.
happy io
Not sure if you solved your
Not sure if you solved your problem, but I had a similar issue a week ago. I installed a Sony stereo and as I am colour deficient thought that this green wire (illumiantion) was black or ground. Kept blowing a marker light fuse until I went back and disconnected that green wire. The problem was that the Mitsu stereo loom does not incorporate a ground like most aftermarket stereo looms. My old (Mitsu) stereo grounded through the frame of the stereo itself. So what I did was connect the ground wire from the Sony stereo to a grounding point on the car. Everything works and no more blown fuses.
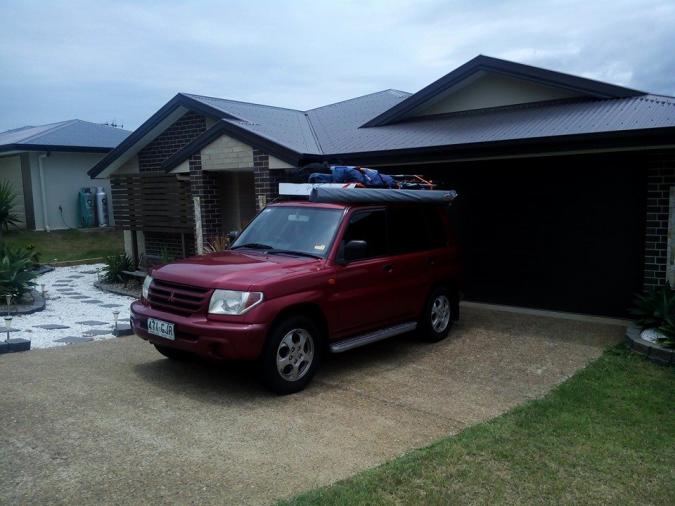
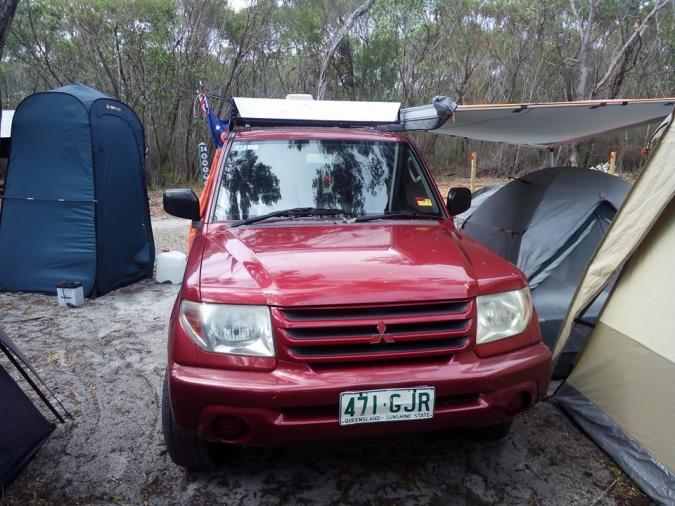
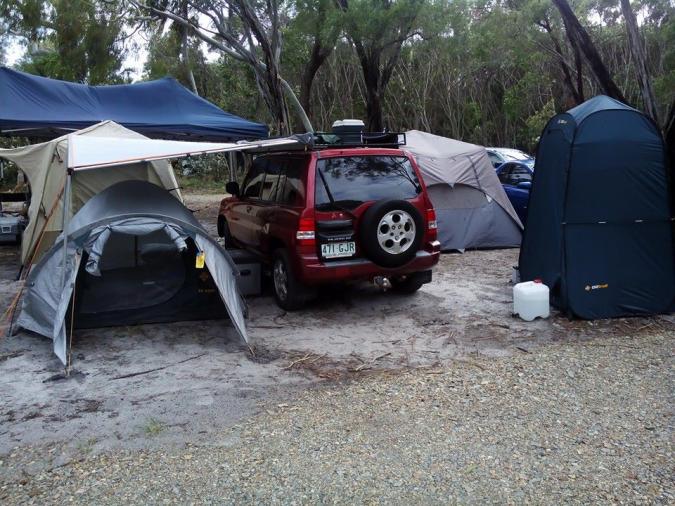
Just a few late picks from
Just a few late picks from the australia day weekend away to agnes waters / 1770
Loaded the new full length roof racks up and off we went,
set up camp and used the rear cooking station for the first time, wired up a led strip to a switch in the back, provided plenty of light
and the side awning was awesome when the rains came poring that night, i was the only one that didnt get fucked up by the storm haha.


Happy IO
Just a few late picks from
Just a few late picks from the australia day weekend away to agnes waters / 1770
Loaded the new full length roof racks up and off we went,
set up camp and used the rear cooking station for the first time, wired up a led strip to a switch in the back, provided plenty of light
and the side awning was awesome when the rains came poring that night, i was the only one that didnt get fucked up by the storm haha.
Happy IO
it was easy to make mate, i
it was easy to make mate,
i just used box section cut and bent to form 2 rectaingles, more box section to seperate the 2 forming a box frame, weld it up and paint the frame, ply top cut to fit the io's moldings, wraped it with some easy clean hard waring fabric.
couple solid sliding brackets for the pull out table, got a stainless sheet for the top so it was easy to clean and no stress for the gas cookers now
gives you heaps of storage underneath for all the recovery gear, first aid kit, compresser, few storage tubs with cooking stuff etc. worked out well.
First - congrats on your purchase ...
And - I like your storage system - very nice, very neat - most people seem to go for a fold down table on the inside of the door - your is the first "pull out table" I've seen.
You appear to be stock height with possibly some "sag" on the front (a minimal amount) - in terms of lift - the first step is going to be establishing which front struts your vehicle has on it - look for the "strut data" thread, it shows how to measure your existing struts - once you know what it has, you can then decide the way forward.
Wheel offset - I don't remember - but - if you remove a wheel and look at the inside, the details are cast in to the rim - rim offset is measured from the centerline to the mounting face,