How I added my extra DSP button so I can fit my own USB radio

Just to follow on from Cesare's excellent work here is the unit I want to add my switch to and as you can see I have started to pull the cowling off.

The best way to get it off is to grip it from the windscreen edge, lift to release the clips and push towards the screen.
Here is teh cowling clear to see.

The unit is held in place by four self tapping screws. not the ones on the side of the unit but down below here.

Remove the harness that goes in to the unit by squeezing and pulling and the harness retaining clip again by squeezing - I used a thin pliers as my fingers were too fat.

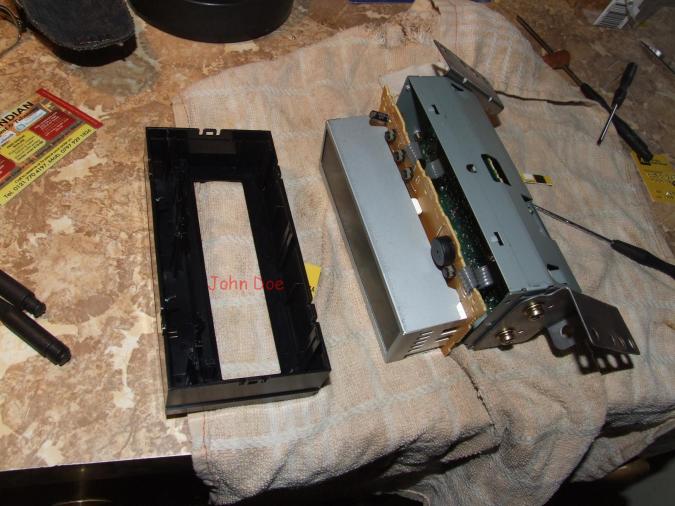
Next to remove the plastic casing there are six clips to release. I went round to each and inserted a bit ot plastic under all ot them together by gently lifting each one with a fine blade as I went then a tug and it slipped off.

When teh case is off teh printed circuit board is held with three clips and three screws. Remove the screws first as it makes releasing the clips much easier.

So here we have the unit torn down.
I then bored a hole for the switch to fit into.

Then the switch was pushed in from the back, already wired and then held in place with superglue.

One wire goes to the printed circuit board and the other to the variable pot. I chose to put the pot after the switch so I could have it external to the unit for adjustment later.An earth teminal is soldered to the lead and connected to one of the screws that hold the unit in place.
.
So you can see the adjustable pot here.

And here it is installed with its little red button.

I would get a longer tactile button if I were doing the job again.
Just one problem, it does not work.![]()
Not completely dead
hi mate,
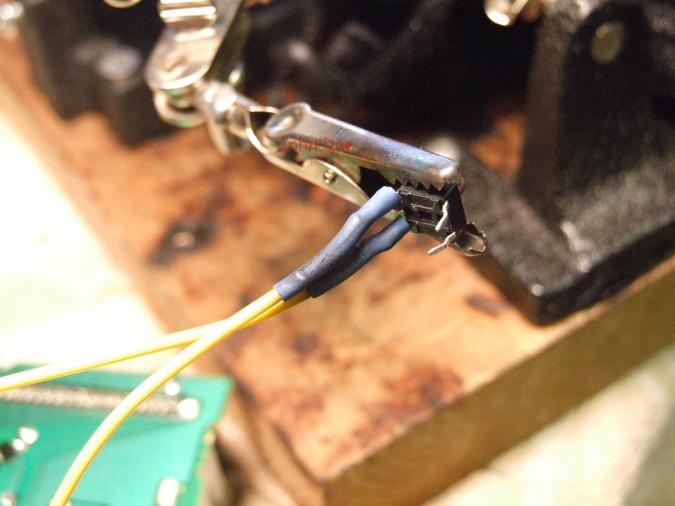
could you explain what's the status - LCD not shine ? DIED ? - could you make isolation between button pins and the LCD frame ? as i see You have not isolated pins .. who can be "in touch" with metal lcd frame ... honestly, when i go to the car for testing - i had open whole device .. and i remember this issue - like Your's already .. watch on the pictures where is pin's of your microswitch button and where is this lcd frame ... chcek this 1'st please.
The LCD works, shows temp and so on but pressing the button does not change anything.
As far as I am aware the tactile button pins do not touch any metal.
I think the problem is the potentiometer. I think it needs need something better. I might get a bigger one.
have you any multimeter ? to
have you any multimeter ?
to measure the resistance step by step from 6,1 to 6.9 with step 0,1 ? on my case, i unplug resistor - and fix him on position 6,1 then i connect him to the wires, if not work - i change the resistance to 6,2 and repeat until i found right value for my lcd unit
I have a multimeter but it was hard to use on these little pots
have you any multimeter ?
to measure the resistance step by step from 6,1 to 6.9 with step 0,1 ? on my case, i unplug resistor - and fix him on position 6,1 then i connect him to the wires, if not work - i change the resistance to 6,2 and repeat until i found right value for my lcd unit
I set it to 6.5kohm before soldering then tried adjusting it later in situ. It's why I had the potentiometer outside the head unit; so I can make adjustments. The earth connection is fine, I checked it. The tactile switch is fine, I checked it.
Might try this http://www.ebay.co.uk/itm/2-10k-POTENTIOMETER-Lin-variable-resistor-Linear-10-k-/220347197787?pt=UK_BOI_Electrical_Components_Supplies_ET&hash=item334db7695b
In stocks
i solder him after i found the right resistance.. then i fix he's position by glue, then i solder him.. ,as you saw is very hard to change the resistance with step 0,1 to find the correct value..
I found a 10K regular size pot in my stocks which I can get a more accurate setting from on the m/meter. When the rain goes away I'll try it set at 6.8k.
hi mate, could you explain
hi mate,
could you explain what's teh status - LCD not shine ? DIED ? - could you make isolation between button pins and the LCD frame ? as i see You have not isolated pins .. who can be "in touch" with metal lcd frame ... honestly, when i go to the car for testing - i had open whole device .. and i remember this issue - like Your's already .. watch on the pictures where is pin's of your microswitch button and where is this lcd frame ... chcek this 1'st please.