Fielies South African IO


Well Jaco and myself are busy
Well Jaco and myself are busy with a aftermarket bumper as we do not get anything in RSA to fit on the IO and I mean NOTHING.


Then today I fitted a side step from the VW amarok single cab and it came out looking like this:

I did a trial (as i work for Bosal Africa and we manifacture side steps, cattle rails, bull bars, roll bars, exhaust & towbars) so I have all the resources. One of our R&D guys who also likes off roading said that we have to give it as try. Its a 76mm pipe that we used but obviously the brackets does not fit so we have are busy making ones to get the ball rolling. He also suggested that we go stainless and polish it up if I do not like the powercoat. I will look like its been chromed.
what do you think?
Hi There, Also a proud IO
Hi There,
Also a proud IO owner of SA,
I Realy like your IO, looks awsome! I have a couple of questions, i only recently bought my IO 1.6 SWB, I love it, how ever it is time for new tyres, What is the biggest size a/t that I can fit on my IO without making any modifications? And if I have to make minor modifications to fit a bigger size, what do i need to do and how much does it cost?? I have about R8000 to spend, you seem to know allot about the IO, so what do you suggest? Iwould like to get 4 new tyres, but I can do with only getting two as I still have allot of life on my front tyres and they are a/t, the size I currently have on is 215/70/16, how much bigger can i go?
My thoughts are to get some nice, big tyres , lift my IO (if It wont cost me 2 much) and fit some spotlights.
would you say I can do that with only R8000?
thanks.


mate those side rails and
mate those side rails and that front bar look sick.
is the front bar something you guys are working on and are planing on making. if so i have to get my handa on one...
and the side rails to would look awesome, especially in polished steel on my pearl white zr
The brain behind the bull bar
The brain behind the bull bar is Jaco (also on the forum with the white 5dr) we have it down to some fitment issues and then manifacturing 1 at first. We had to do it seeing NO ONE in South Africa is willing to help. One thing you have to understand about RSA is the type of vechicle that we monstly drive here.......TOYOTA HI LUX / TOYOTA LAND CRUISERS. Development and aftermarket products is freely avaible with every second guy making at pop up. The angle we are gonna take with these is to get well underneath the cost bracket than the normal ARB / TJM bumpers +- R15000 ea.
yeah sounds like oz. theres
yeah sounds like oz. theres not alot in the way of mods for mitsubishi and then along comes toyota and you can get every mod under the sun for them. oh well, thats the challenge i like about the iO. its unique, rare and from what ive seen and heard very capable...
Amen, I think thats why we
Amen, I think thats why we are a different breed the Pajero owners, as we get such a passion for our cars because we do so much recearch to get to our goal. My better half is so fedup when she sees me brosing the forums, cos accourding to her I should have that passion towards her. LOL

sweeeeeeeet!, that bar is
sweeeeeeeet!, that bar is nicer than the one i have drawn up! i might have to steal your design :)
nice work with the side bars too. Im going to make my rock sliders from RHS I think, Doesn't look as good. but i think it will work better? a long flat surface to rest on the body seam and spread the load those nasty boulders will give :)
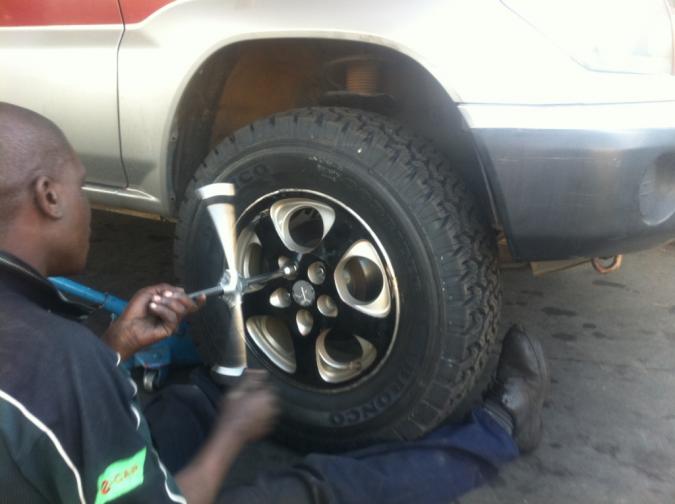
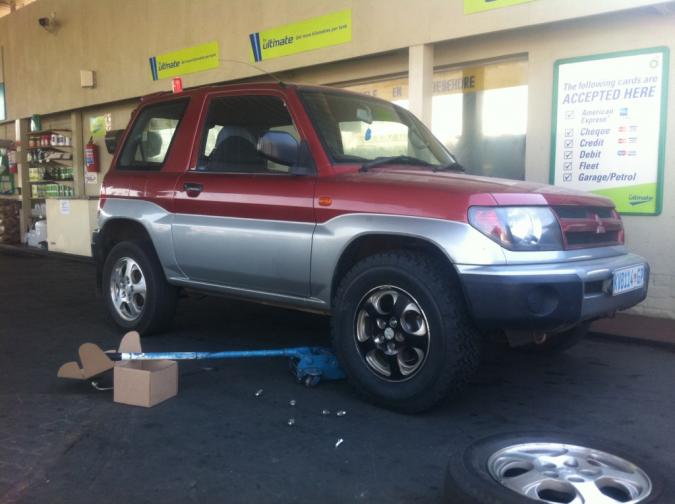
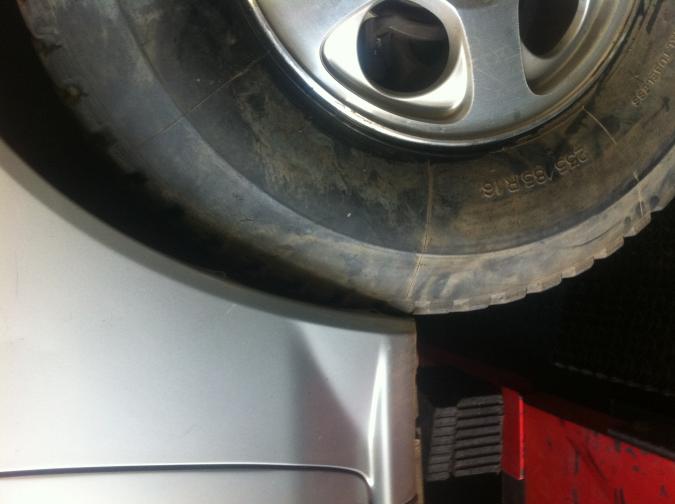
Ok had a tyre fitment 2 weeks
Ok had a tyre fitment 2 weeks back. Bear in mind that I already fitted my KYB (25mm) lifted shocks and added a 30mm spacer (114x5)
Tyre size 245/70/16


with the wheels next to each other there is almost a 60mm height difference between them. This means almost a 60mm direct diff lift ![]()
Awesome! Looks like it fits
Awesome! Looks like it fits :) looks like 31s would probably fit too? any rubbing? or is it all good with the 30mm spacer?
Good to see evidence that KYB do make a lifted version of the struts too! I wander if we can get both types in Australia.
60mm difference between the tyres will give you 30mm more clearance at the diff.
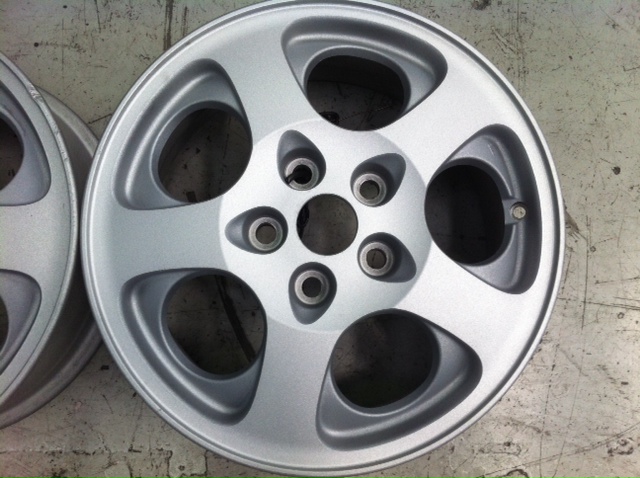
I have thought about painting my wheels in the reverse of yours, (black on the cast finish and leave the machined surface alloy) you going to do the rest of them?


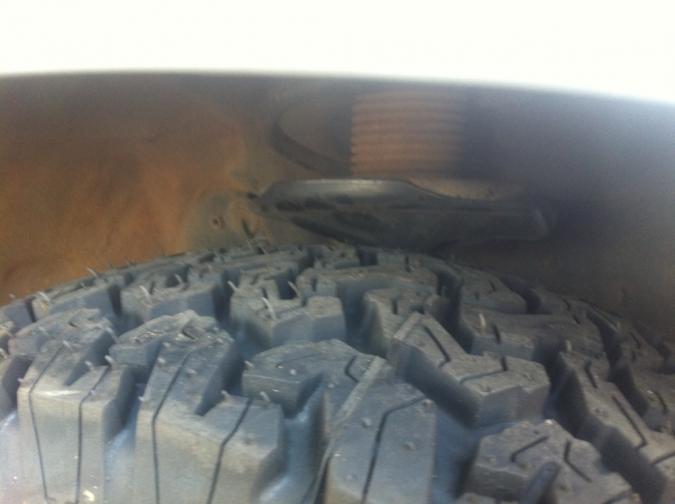
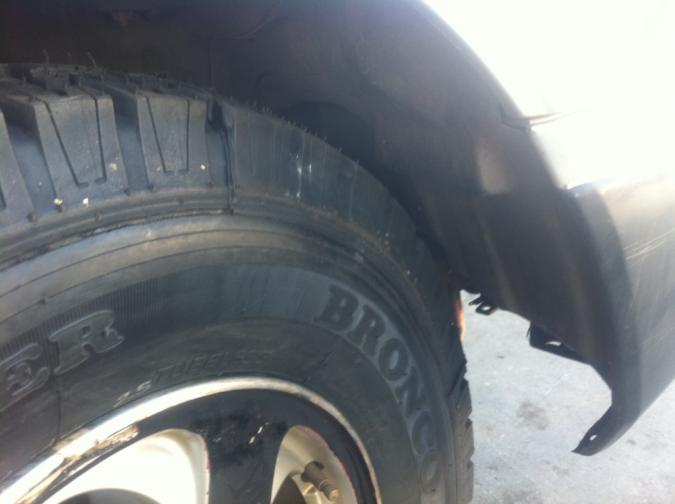
Just take another 20mm of as
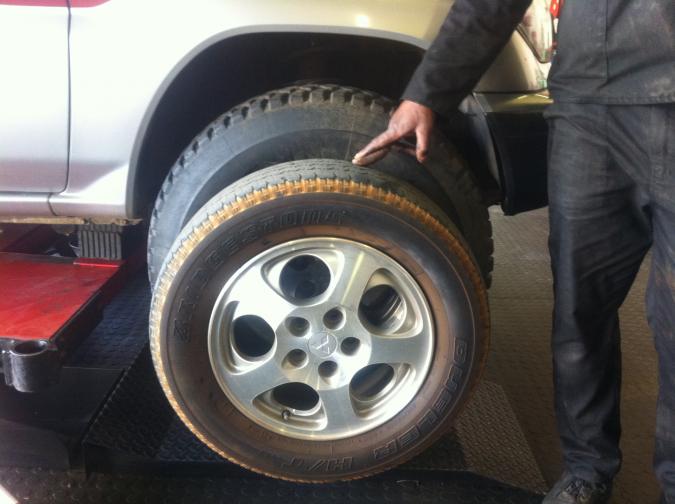
Just take another 20mm of as the wheel was in the air at that stage. The tyre has been warn, I got it from a local company that has rally cars and use them. The guys said if they fit I can use them, the are used for "competition only" lol so its not for road use at all. I could have used them if they would have fit. The guy said they normally regrove it again and use it for one race more. What I managed to measure was from the ground to the arch on the 215/65/16 (785mm) and the 235/85/16 (+-950mm) i also took a measurement of the A arm from the ground and its about 80mm higher, so I gain 80mm ground clearance

The price is right! Id almost
The price is right! Id almost be tempted to make some mods to the body and use them :)
need to get those 5.11 gears in the diffs tho! Im going to start hunting down an auto 1.8 at the wreckers to swap into mine.
mainly want lower low range, need to jump in on a GP with the greeks if its not to late, Not cheap tho. Im still hoping the L300 or old delicas 1.9 low range might swap into our transfer cases.
80mm is about right, My std tyres were 26" when I replaced them, 32" give you and extra 6" = 3" lift, or 76mm. simple way is to measure from the center of the wheel to the ground, the mits symbol makes it realy easy to find the centre :)
Rocksliders
Well we are battling with the suppliers to get a welding quote out the guys, but as soon as its ready you guys will know. Its been hectic at work lately but had a fitment test on the rock sliders the other day and its looking good. Just wondering if I should power coat them black or silver????


Window tint
Yes i agree it will look pretty awesome, already got a quote as well R1750 (218 Aus $) for the whole car. But for now I have to fix my steering rack, fit a new clutch & put mud terrain tyres on. Hopefully it will be done before summer break so that I can get enough play time in over Christmas break

Give it a go!
I've fitted 'privacy' reflective tint on windows @ work.
Easy as, but fiddily.
Start @ the top & work your way down from the center & out to the sides.
Using Windex, a squeegee & a brand new Stanley/Olfa blade.
That turned out great.
Maybe cars are harder with the curves?
I've been told they steam the old tint off?
Hate the glass to crack.
Let us know.
Cars ARE harder
Flat surfaces are easy, cars on the other hand have curved glass, and sometimes curved in two planes, which means you have to use a razor to slit the film , allow it to overlap and then trim a second time to get rid of the overlap.
The edge is another problem area, especially on a window that goes up & down - you either trim just "inside" the channel leaving a visible clear border, which I hate, or you run the risk of the rubbing action in the channel peeling the film off - I developed a way to deal with this, but it's very time consuming, and I'd love to know how other folks deal with it.
What I do is remove the glass from the vehicle, cut the film oversize and then apply it - after the moisture has dried out use a whetstone (for sharpening knives) held at a 45* angle and trim the film by rubbing it against the edge of the glass - this bevels the film to match the glass leaving no edges to catch as it moves.
As I said this is time consuming and needs a large secure work space since the vehicle will need to be secured whilst the glass is out.
One warning - if you attempt this on an iO, you will need to reprogram the limit sensing on the power windows - each power window has it's own ECU in the motor, and if disassembled, you will need to set the top of the frame when you reassemble it.


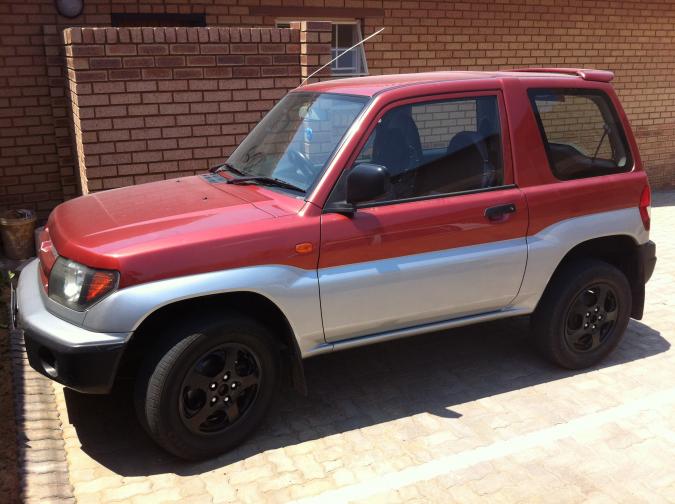
Lift update
Just a quick lift update before I go off for the weekend. Had new coils fitted 2 weeks back but not completly happy with it as my car is still leaning to the driver side. The upside is with all i've done so far (KYB lifted spring pan front shock, new coils) I managed to get a total lift of 75mm "self high five" ![]() from the original height. I'm busy with the installer to sort the issue out why the coils is sagging on the driver side. Next week ill post all my measurements in detail for the forum to have a look as well as a very expensive excisice I did with my tie rods that was worn. Enjoy the weekend.
from the original height. I'm busy with the installer to sort the issue out why the coils is sagging on the driver side. Next week ill post all my measurements in detail for the forum to have a look as well as a very expensive excisice I did with my tie rods that was worn. Enjoy the weekend.

car leaning
Was the car leaning before? It may have a few different problem, but remember Johnicue, one front spring is longer than the other, it might be a good idea to swap left right? and make sure that you check on a dead flat surface...you can do it:) with these tyres it has to look fantastic:)
Happy io
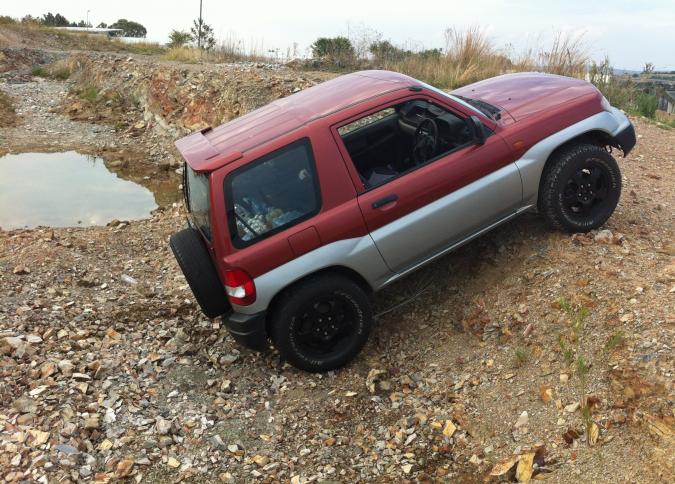
RSA IO Playing in the mud

Cosmetics
Yes its not the best one, but its great that I got it for free. Its been laying in my garage for almost 6 months now so the other night I decided to pt it on. I dont think it will effect my approuch angle that much as it is a dead centre line from my bumper to my axle. But still busy with my AM bumper then that one will be replaced.
Not certain that we're thinking the same thing...
I dont think it will effect my approuch angle that much as it is a dead centre line from my bumper to my axle.
Any thing that hangs below the bumper is likely to affect the approach angle - the mounts wrap under the bumper. Take a sheet of plywood, place it long side down and slide it under the vehicle until it contacts the front edge of the tire and then lift the free end until the sheet contacts the vehicle - the angle the ply makes with the ground is your approach angle, as long as the ply contacts the bar first, it has reduced your approach angle.
How much of a problem this is depends on the nature of the terrain that you're in - and as you say - free is good.
AM Pipe Bumper v1
Ok guys good news, I received the majority of the laser cut profiles for my pipe bumper this afternoon and im pushing to have it done by the end of the week as we have a HUGE competition on that ill be competing in with my IO monster. HA HA Will keep you posted with pics.
Pipe bumper update
ok after working the whole week on the bumper during lunch time at work, borrowing tools, welders, tape measure ect finally got the centre piece on tonight after staying a bit longer 20:30. hopefully my pipes will be bent tomorrow and i can do the last assembly. so far im proud to see my hard work is paying off as its not only profiles anymore. i tried loading pics on using my tablet but it doesnt want to work so ill have to load the from the laptop. seeing no one has made a comment asking how its going i maybe leg you wait until its done and fitted?
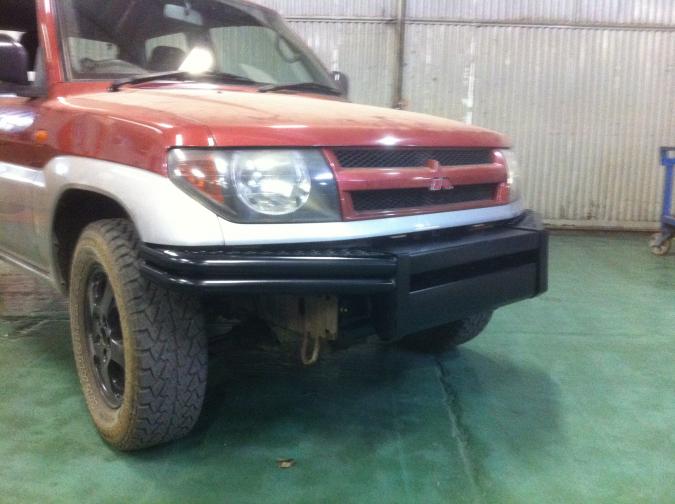
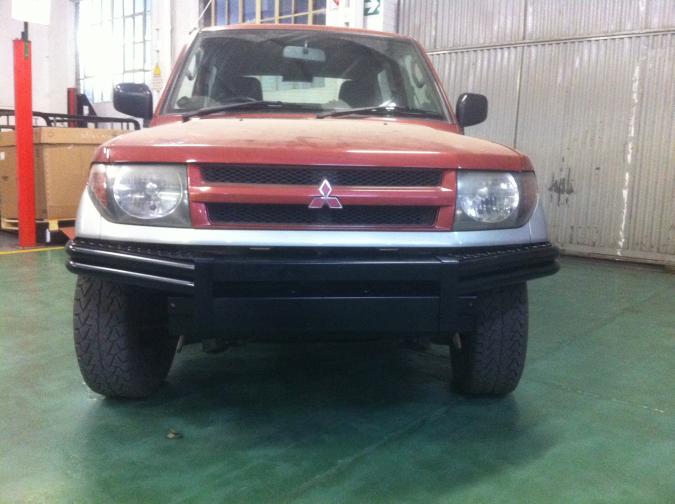
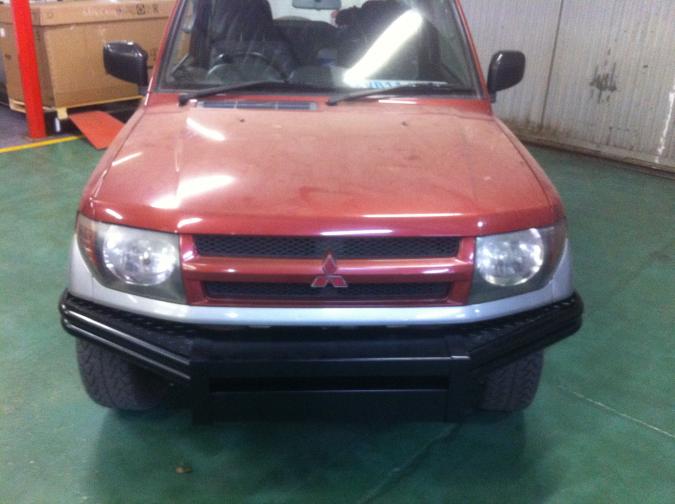
Bumper Completed
Hello guys,
Luckily the suspense is now something of the past, I would to introduce to you my front pipe bumper version 1.1 ![]()
I worked a whole week on this during lunch hour borrowing tools ect to get it up to a point where the pipes was the only thing needed to be assembled. On friday afternoon (Bear in mind I had a rally on the next day so I wanted it to be finished) @ 14:00 and finished at 19:00 fitted and painted. I used a spray can just to get a colour on it as I would like to hammerite later. Trust me, i battled alot as I only had one pair of hands with no one to help alligning the parts but managed to get everything up and welded. The pictures was taken in our store and the lighting was very bad. Will post some new pics in the daylight as soon as I have the IO washed and polished.
front bar
Whoa! agree the black is not the best but whoa!! you have done a nice work, do you have some pics of the mounting, or before going on the car.....I am impressed!
Very, very well done....I think that a small plate to cover the side, end, of the chassis (in the first pic) , going in an angle and joint to your beauty work, would be nice.....
Happy io (I told you we were watching...)!!!
Looks like some fun
Looks like some fun there!
What are the mods sofar? and what is on the list for future mods?
I want to see some update pics when you do the next rally!