Claude's io/ 2002 ZR/ Built thread only...happy io!

put it back in!!!
HO NO!! they do get bog!! but true for the access, but you can weld some nuts on the back plate instead of rivets. The hook have been removed when fitting the tow bar.
Happy io
man - that hook is a tough mother! I'd be putting it back in and bolting your towbar through it wherever you can. - no way that hook would EVER pull out or twist the back end with a towbar fitted to spread the load across between the rails.
I've dragged really massive logs with the hook no worries, i'd feel totally comfotable with someone really yanking on it if need be. (half log visible in pic)


hook
I remember seeing your comment about it a while ago, mine have been removed a long, long time ago, it is probably somewhere in my garage!! from memory I couldn't keep it while putting the tow bar, but I don't remember why...anyway I can use the tow bar for light towing/recovery, but I see your point as, it, being a wasted good "anchor" point.
Faulty one...lol...I walked right into it...lol...This said, the new/bigger tyres and the diff lock have kept me out of trouble for a while.
Happy io
Video
This is a " video test" my first half decent!...lol... I hope that you can see it! and I hope that the quality of the video will be there. (I still haven't work out how to put the "small screen" directly!....) I have try a lower quality than HD widescreen, I am not sure that this one is the best....I might change it later on....
This is a day trip from Canberra to lake Eucumbene that I have done in June 2012, no hard 4x4 but some nice view and some wildlife.
Edit I have this one in HD, I am still not happy with the quality...I will work on that....
Happy io
Edit, I have worked out how to replace the link by the small utube screen....
http://youtu.be/3HFDj6MiOjs

Some video tips
Now I'm not an expert, but I have been making a few youtube videos of late using my gopro under the alias of "AverageRider", mostly of my dirtbike and mountain biking trips.
A friend of a friend is actually a professional youtube video maker in Canada. I've been passed down the following advice for successful youtube clips:
- Videos should be around 4 minutes, otherwise most viewers will switch off or don't bother watching.
- Use as many camera angles as possible - with some creative editing, you can do a fair bit with just one gopro camera with shots from 3 or 4 different viewpoints.
- Break up long scenes into 4-8 second clips. Most music has bars or phrases(?) which are around 4 seconds, so if you can manage to clip it right then it will be in time with the music. (With your video Claude, I would have cut the first snowy dirt road into about 3 shorter clips, maybe 12s total).
- Try to have a narrative - beginning, middle, end.
Sometimes you have to be brutal in the editing process. Invariably I end up with around 2-3 hours of footage, from which I cut it down to the best bits which could go for 10 minutes, but then upon watching it back, if there are any disjointed bits, they just get completely scrapped! Its hard to do, but the final product is a lot more watchable, especially by someone who might not have a particular interest in what you are showing them.
Here is one of my bike videos. Feel free to check out all of the average rider stuff. The latest video is a lot longer at 9 minutes, but thats partly because I didn't have time to edit it properly, and partly because it shows an entire mountain bike run from my recent visit to Whistler in Canada.
And, while I'm plugging things, if you're into any sort of biking, check out www.averagerider.com
I based much of it on this site, and I'm hoping to get some members talking about their rides and all things to do with bikes.
Happy youtube!

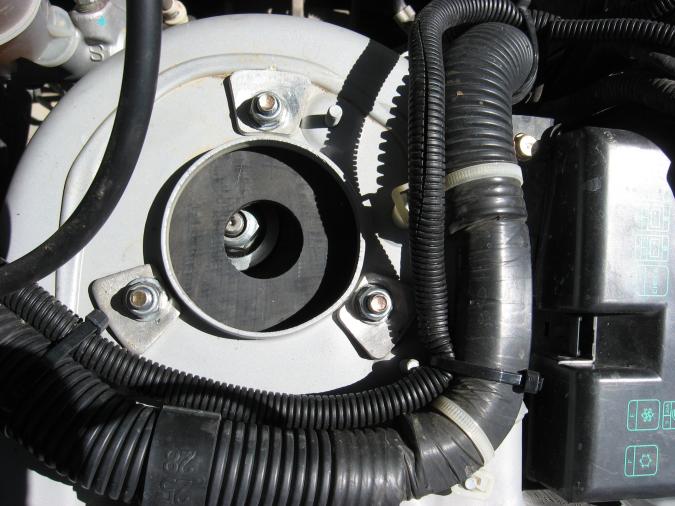
Air box resonator!
He told me that the little black container (see a few post 38 above, talking about the K&N) on the air filter conduct is actually a resonator, as Mitsubishi didn't like the noise from the induced air. Another advice was to remove it as it slow the air (not by much...). If I understood, air goes in the resonator and make a noise on an different frequency and then cancel the original noise making the system quieter...
Happy io
Claude mate, Is the picture below the box you speak of?
From what I have read it's the resonator that stops the induction noise, BUT MITSUBUSHI I like induction noise :( Would you reccomend removing it? Especially to if a snorkel kit is soon to be fitted to maximise air flow?


Cool mate'! I don't know
Cool mate'! I don't know where that message is you sent but I'll post up some photos of the trip! Before the next one I've got a bit of work to do though, vacuum system or solenoid is broken, and one low range isn't working ( may be because of the solenoid), but for now it still gets me around and hasn't missed a beat @ 230k.!
Maybe a thread of your own
Perhaps starting a thread of your own might be better than taking Claude's thread off topic - however, I just wanted to let you know the "low range" is purely mechanical, lever operated - no solenoids or vacuum, although I believe there may be a switch (or two) that turn the indicator lights on & off,but in no way affect the low range operation.
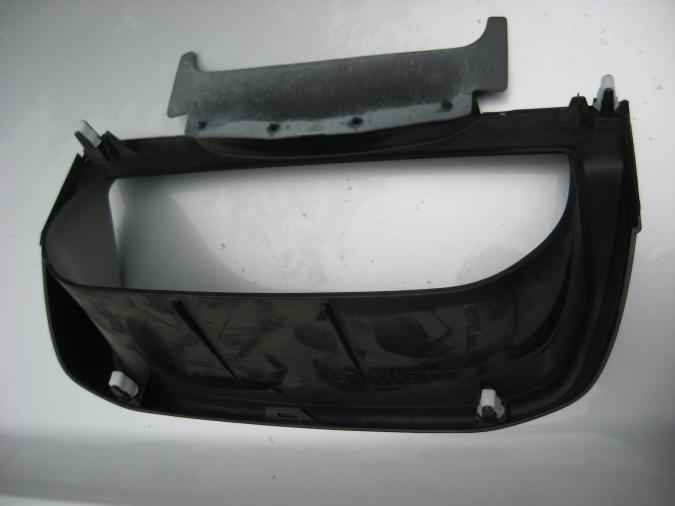
New bash plate
I just got my bash plate, and got it fitted just now. It is made of aluminium, 5 mm checker plate. I don't know if it is the best choice, time will tell!!
So far, it does look good, and I am happy with it...![]() It does weight a bit under 6 kg. Later on I will make a small "wing" to protect the power steering hose.
It does weight a bit under 6 kg. Later on I will make a small "wing" to protect the power steering hose.
Here is my new bash plate
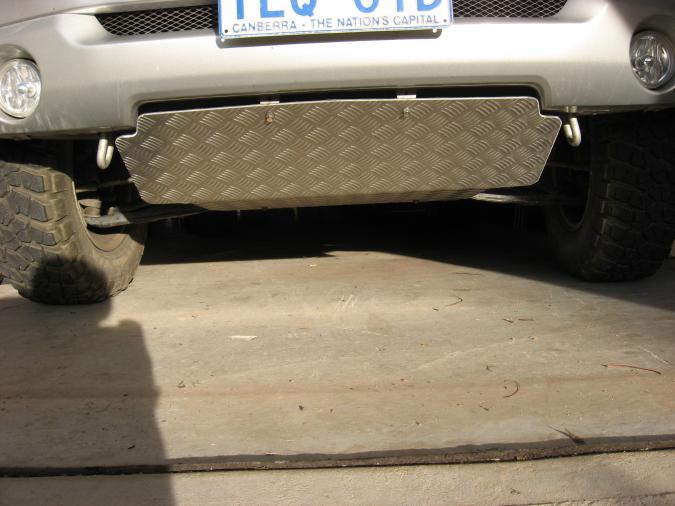
And again...
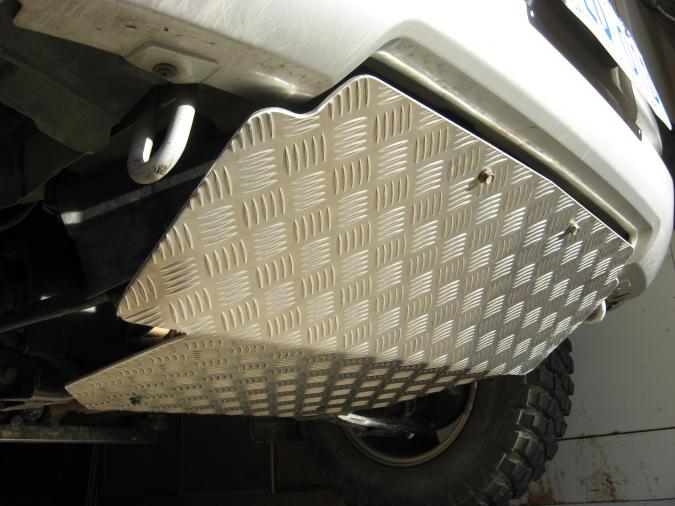
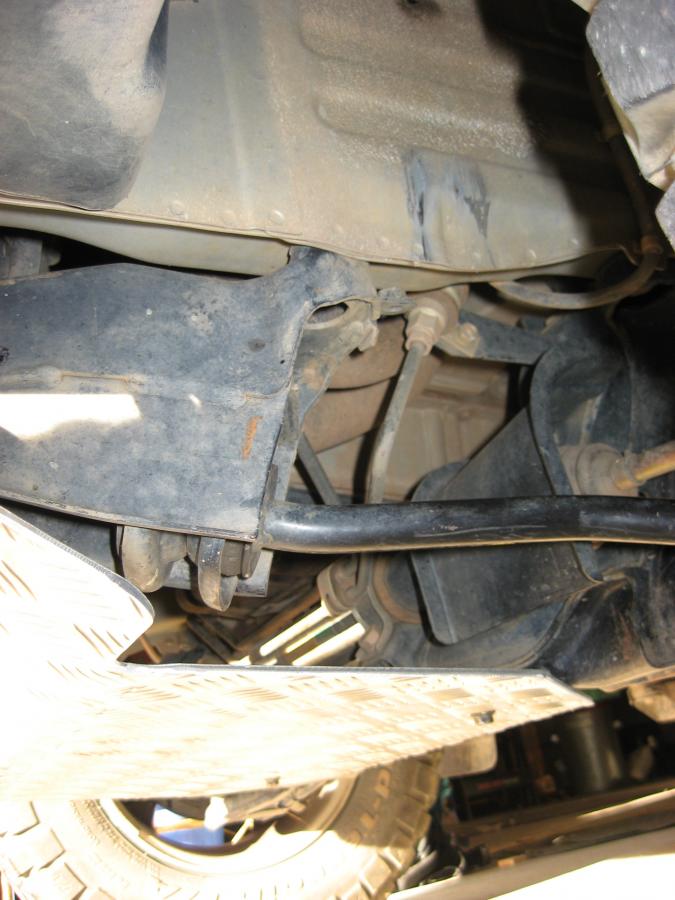
Here you can see the power steering hose that, I think, need some protection....to be done later on...
Stay tune for more mods on the way.....
Edit: that bash plate have been great, robust enough, light weight, and looking good, no problem at all. Once in a while after some stronger hit, it did bend but still done the job and could be straighten once out for the oil change.
Happy io
Did you ever have the stock "under cover"?
I don't want to call it a "bash plate" - it's way too flimsy - but it does have "turned up" sides, and will protect the powersteering line. I have mine off the car right now (took it off to do an oil & filter change on the weekend), so it would be very easy to get a picture if you've never seen it.
Oh - by the way - checkerplate will protect the underside, but I'm told it's supposedly not the best material - the raised "ribs" can catch on rocks and what have you that flat plate will slide over.
bash plate
Yes, I had the original plate before!!
This is exactly why I choose the checker plate. My thinking is that on a flat plate, anything you touch, will slide all the way, leaving mark...all the way....the checker plate will get mark on the "ribs" only.
As for the raised "ribs" if they catch anything and ...slow me down....I will use the right foot to compensate!!! there isn't much to grab on!!
But this is only details, I don't care much about the scratches or the catches..., I like the look of the checker plate better than the flat plate and no matter what you use, it will be better than the original one. Mild steel, aluminium, stainless, flat, checker plate, holes, no holes....they all are a bit different, but on the end of the day, they all protect the car....and that is all it is about....isn't it?
I am happy with mine.....but if, later on, I find that for any reason the checker plate have any fault....I will mention it....
Happy io.
bash plate maker
I offered him to put an add in the forum with his contact, to give him more work, (as I was very happy with all aspect of the sell/making of the plates) but he choose/preferred/wanted not too...
Sorry... I think that he was doing this on the side but have enough work, not sure....at least we got a set a nice bash plates.....
Happy io.

.
I offered him to put an add in the forum with his contact, to give him more work, (as I was very happy with all aspect of the sell/making of the plates) but he choose/preferred/wanted not too...
Sorry... I think that he was doing this on the side but have enough work, not sure....at least we got a set a nice bash plates.....
Happy io.
Ah ok, I can understand that. I will just have to keep looking locally.
rear air bag spring helper
Before going on holidays I removed the air bag spring helper out of the car I recently bought. I fitted them to my car.
We left with the tinny in tow and the back full of gear and these air bag were great to properly level the rear of the car and removing completely the wandering (my shock are getting a bit old and will need replacing soon, but it doesn't help with the wandering!!!). I had to try different setting and I found that too low is equally as bad as too high.
They are easy to fit, and I can lift the rear of the car by close to 65 mm with around 30/35 psi. This could be used, in some occasion, while doing some 4wd. I found that when starting to climb out of a deep hole that the rear tend to compress, with these bag it should be much better....I will try, and make a small video to show, later on.
I think that they are fun to have :) and very practical to level the car when towing.
I don't have any reference to give you as they don't have any marking on them...the valve were fitted on the rear bumper on the other car but I fitted them close to my seat to be able to play with them in the car.
The bag

Inside connection, close to the compressor (valves to be fitted properly later on) like that I just plug the air gauge to the compressor and no extra length needed.
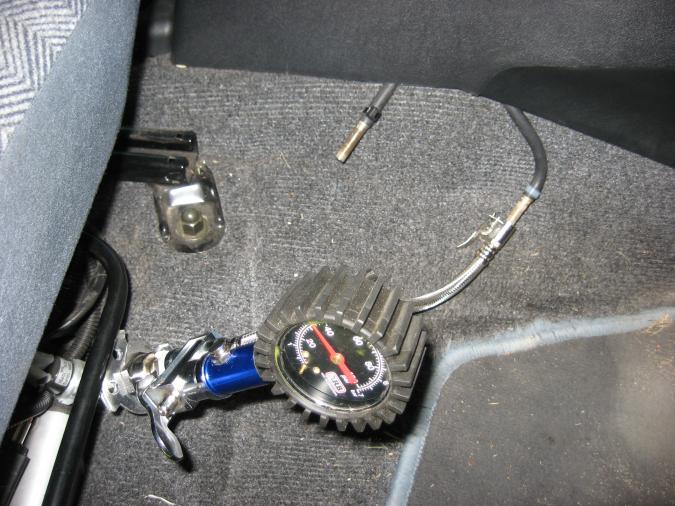
My compressor, fitted by ARB for my rear diff lock

Car with no air in the air bag, car not ground level....

Car with the airbag at close to 35 psi, sorry no exactly the same angle but enough to see the difference.

Happy io...
How loud is that?
Claude
How noisy is that compressor? I've been toying on & off with the idea of fitting a locker, and of course an ARB air locker has been considered, mounting space under the hood of the iO is not exactly plentiful and I've noticed that a couple of people have fitted them under the seats, and been curious - how noisy are they when mounted in the passenger compartment?
how loud?
Before having this compressor fitted I had 2 other, a very cheap smaller one (getting old but still going), and just before fitting the diff lock I bought another one on ebay for $120. They are all about making the same noise level (give or take) being under the seat doesn't make it better or worse. When using the diff lock the compressor goes on for about a couple of seconds only, and 2 seconds (or so) once in a while and it is not a problem (to me anyway). When pumping the tyres I am, obviously, away from it.
Having one connected all the time is nice to have as it is faster and easier to use.
Happy io.

pajero io snorkel
Yes it is a proper io snorkel, it come from Brazil, from OGZ, and it is a present from them.
I contacted them to buy one. OGZ didn't have the authorisation to export their snorkel. They have done lots of paper work to get this authorisation from the Brazilian government...but no luck. Anyway, they got sick of it and gave up, yes I was very sad....then...instead of selling it to me, she gave it to me, I was happy again ![]()
I had to organise the transport, pick up and all, this was a challenge as well, as it was a big box and while "Fedex" are very practical they are very very expensive (didn't used them), to add a bit of luck, a removalist conpanie came to have some contact at my work place so ...I put them to the test and they took care of it at the best price I could find.....
It took 11 month, more than 50 emails, lots of translation, paper work.... but yes I have a proper and nice snorkel....and I am very happy ![]()
Happy Claude....:) and a big thank you to OGZ....
Happy io
snorkel part number
Thanks.....that car is challenging, but it is nice to get some result :)
Sorry, no part number....and since this is a present from them I didn't ask if they have different model....it is made with fiberglass and comes at as a complete kit to connect to the original air filter assembly, I may have to remove my K&N pod filter....
From my translation to the Portuguese installation guide, the snorkel is held on the guard with pop rivet, I am not sure that I am trusting them that much, so I may have to remove the guard to bolt it on with stainless bolts and nylon nuts and washers instead.
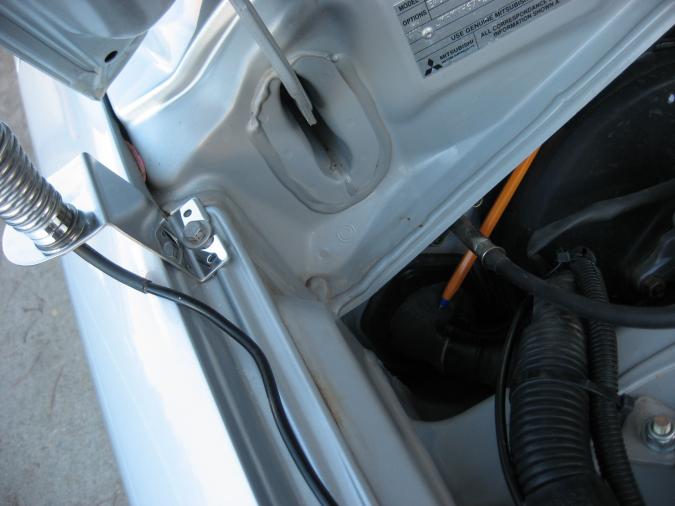
What I found, as well, is the connection to the air filter assembly will dramatically reduced the access to the blinker light bulb, so I might have to shorten the connection to that bulb to be able to replace it when needed.
Happy io.
pajero io strut spacer
I have just made these spacer. I was looking at the "car for sale section" and I saw a Mazda astina, BA 1995, for sale for parts. I gave him a call, and I bought his front spring. I got them fitted to the rear of my car. I will post the measurement when the complete lift is done (around 40mm). I am going to buy new KYB strut and fit them in at the same time as the spacer. I will shop around but I found this one on ebay http://www.ebay.com.au/itm/Mitsubishi-Pajero-IO-KYB-Struts-Shock-Absorbers-Front-Suspension-99-03-/400282682339?pt=AU_Car_Parts_Accessories&fits=Model%3APajero+IO&hash=item5d32b503e3 that looks to be a good price...
The spacer are made in acetal copolymer, black. I have been advised that it is good for this application...time will tell ! I have made them to be not to obvious when you open the bonnet. I made them with a drill press, and I am happy with the result. Instead of drilling a big hole right through, the top section have a hole of close to 31 mm, just to fit the original cover of the bearing's top plate (more discreet and more material left). The thickness is 38 mm, but will be adjusted (if needed) to perfectly match the rear lift....
I don't have or made any drawing, as I made them....going along...with the picture in my mind....
Happy io.
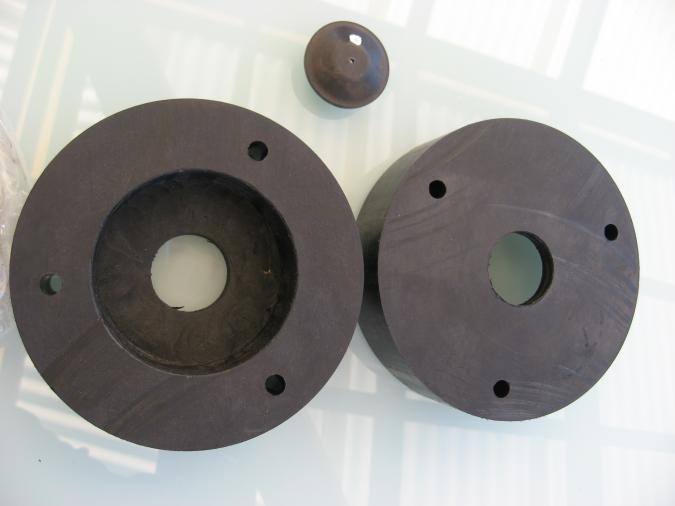
Edit, those spacer have been drilled through after, but worked very well and never gave sign of damages. I have a different set up now, but using spacer is the cheapest way to go for a lift if money is tight. I had them for a long time with the standard suspension.
I still can make some, pm me if interested.
Jaycar Speedo corrector
Because of my bigger tyres my speedo is out by around 5% and to "approve" this size tyres the speedo need to be correct. I have bought from Jaycar a speedo corrector, built it (comes as a kit) and installed it. More info and pictures on this thread http://www.pajeroio.com/forum/speedometer-correction
The access to the speedo itself is very easy, pull the round frame (clips only) and 7 screws later...it is out.
Picture of the frame (you can see the white clips)
The kit at the start

The kit done...
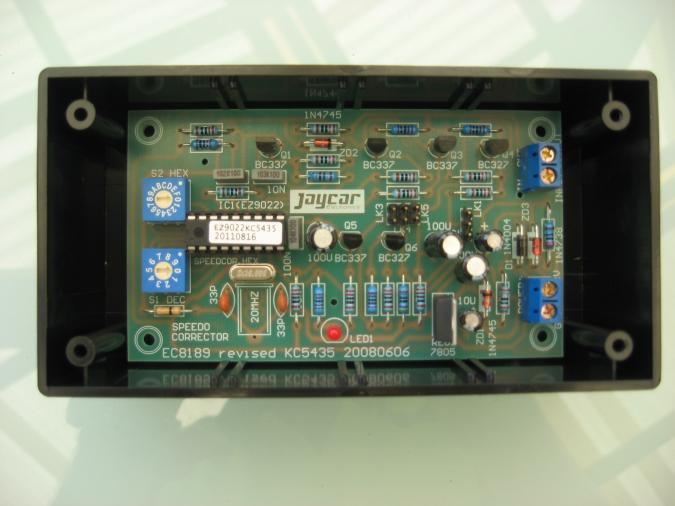
Kit connected to the speedo
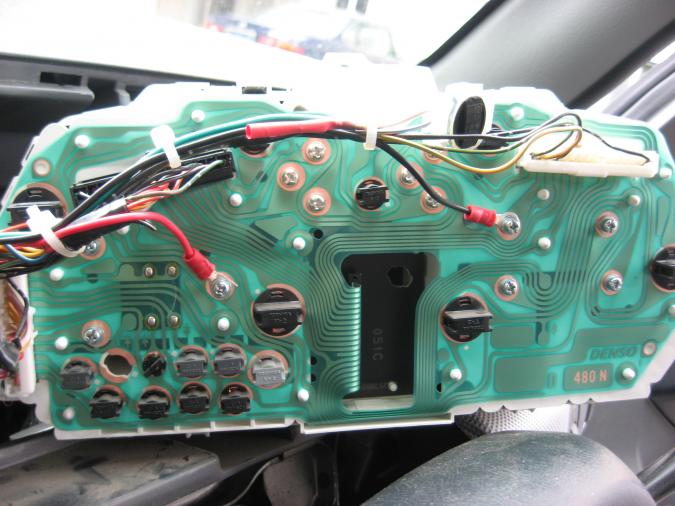
Again, more info at Fordem's thread http://www.pajeroio.com/forum/speedometer-correction
Happy io
Pajero io new strut with the spacer fitted
Here is my new KYB strut with the spacer fitted. At first I wanted to built some coil over, but while I may still do it one day...I choose the easier way, safer, small lift option for the time being.... I still have my adjustable top plate. .
.

Happy io
New strut fitted
A few more pictures, as I just fitted the strut on the car. I will do a wheel alignment later today, I will post the reading.
The lift at the rear is between 45mm and 37mm, and 42 mm at the front. I was going to reset the rear spring to match the front but the difference is very small, so I will wait to see how the car behave on the road before reseting the spring...might be ok as it is.
The first test drive is ...nice...the old one were on the soft side, much better now...and the steering response is a bit better too....Can't wait to try it on the tracks.
I have a very small amount of space left to fine tune the caster and camber if needed...
Here you can see the "off set" of the strut to increase the caster angle, and try to keep the camber a bit more negative at the same time. The strut tower on the driver side have an indentation to give you some space to remove the master brake cylinder. I had to push it back a bit (around 5 mm) to be able to move the top of the strut a bit more towards the driver.

Here you can see the "discreet" finished top

Here you can see the off set of the strut with the adjusted angles
Happy io
EDIT Camber -0.2 and 0, caster 4.1 and 3.8, total toe 0.6mm. Next time I will try to bring the camber a bit more negative.
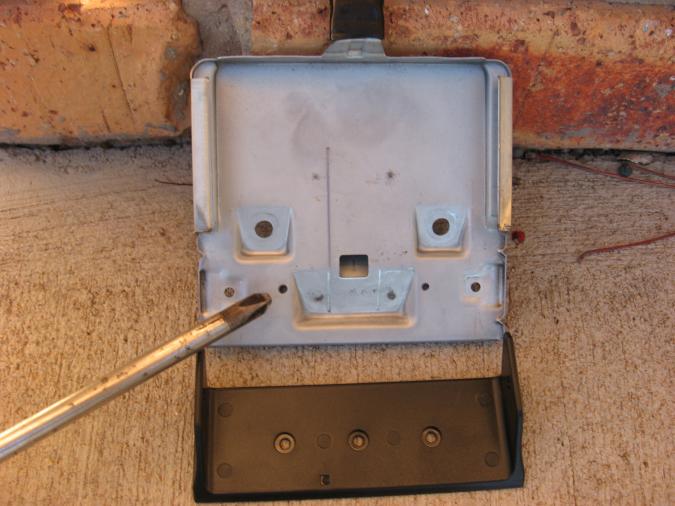
adjustable plate
It is actually a bit better, not that you adjust them daily anyway ! It is better because the top of the adjustable plate is against the flat, strong, surface of the spacer and not just under the top of the strut tower. The top ring of the plate matches the shape of the strut tower (under) after they are tight for the first time, from Kmac that the way it's supposed to be, they never moved after.
Thanks Glen, I like little step at the time, ...for me anyway :)
The next mod, might be the transfer case. I have striped the spare one I recently bought, and I will take it to the "part maker" to see if he can modified (grinding and welding) it to take the 2.85 larger gear. I mean, he surely can do it, but check what he think about it.
With the lift and the slightly firmer rear spring and new strut, the io drives a bit more like a "truck" and less like a car, and still drive very well on the highway.
Happy io

Low range
The next mod, might be the transfer case. I have striped the spare one I recently bought, and I will take it to the "part maker" to see if he can modified (grinding and welding) it to take the 2.85 larger gear.
Its a shame your not close by, Id have been happy to weld it up for you, im 99% sure ill end up doing the 2.85 low range down the track too! I Need to provide that axle snapping torque to my wheels :)
adjustable plate
KMac doesn't offer one for the iO - I think Claude had those custom made.
Yes, I have. I even gave him a bit of a hard time as his first design wasn't exactly as the same height as the original one (by 5 or 6 mm). This said, I am happy with the one I have now. He told me that he will keep the design on the side for further inquiry.
Here one of his email and contact if anyone is interested
Hi Claude,
28NM is all that is needed for nut tension.
The main plate is 5mm thick, then the other plate is 3mm thick, the total is 8mm, this is more than the original mount strength.
The bend that you notice is the plates taking up any slack. Now you should check that the three nuts on each side still hold their 28NM.
Regards,
Kevin
Have you installed your snorkel yet?
Hey Claude - have you installed your snorkel yet?
I was browsing the net looking for information about them - I'm toying with the idea of going for a drive across the border and picking up a few to see if I can make a couple of dollars, maybe start up a small 4WD accessory shop - and I came across a forum post suggesting that they sit so close to the roof that when rain falls water can enter
Pajero io snorkel
No...I have been a bit "slack" on that one.....I have been out a bit more, enjoying the car instead of working on my mods....
Yes the opening is close to the roof, but it does have a 10 mm, or so, lip above the roof line, and I don't think that it will be a problem. This said, if it does happen, the lower section of the snorkel is shaped to catch some water (limited amount) that can be drained with a bolt at the bottom. Again...this said, I did put the original air filter box (with a K&N cartridge filter) and it can hold a bit of water too...
I will be ...extra careful, after/during the first few rain and/or washing the car...hopefully it will be fine...
As to make a bit of money...the freight is the killer...but a bulk freight could make the deal a bit sweeter...OGZ still haven't the authorisation to export...but that shouldn't affect you...
If you are interested, I could put the snorkel on the car (not bolt in) and post some pictures of the inlet...
Happy io
Thanks Claude, that won't be necessary
I eventually found a Brazilian reseller site and got an idea on "over the counter" pricing - just under $800 reals - works out to about USD$400, there wouldn't be much left after expenses, in fact, I could probably get Airflow or Safari out of the US at around the same price, but with a lot less time & energy - at this point getting OGZ out of Brazil would involve a 1600+ mile drive, getting something comparable out of the US could be done with a phone call.
Of course I'm not talking about snorkels for an iO, the market for that here would be non existent, Toyota & Nissan would be the big sellers - I may yet Drive to Brazil, and if I do, I might get a couple for personal use, but as money spinner, probably not going to happen.
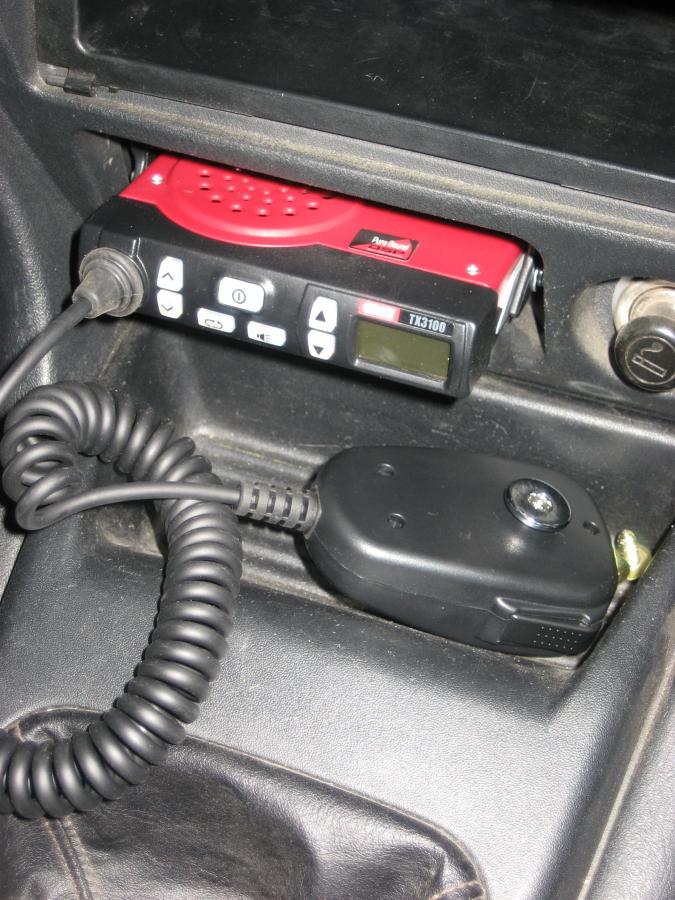
uhf installation
I recently bought an uhf GME TX3100. I haven't much knowledge in them but I liked this one after reading RSR post. It is small and hopefully will work well !
I finished the installation during my lunch. As RSR, it is installed instead of the ashtray. Not fully in, for easier installation and to leave the top speaker unblocked. (the speaker works well)
For the electrical I connected it on a cable that had power on "acc", this cable is already fused (cigarette lighter) and I am not sure if it is the best way of doing it, but I think that it is safe. The uhf have its own fuse as well.
For the antenna....too many different type, so I bought what my local shop had !! It is a 6db, and I have another tip, a 2db. For now it is mainly for close range, so not vital to have the best one.
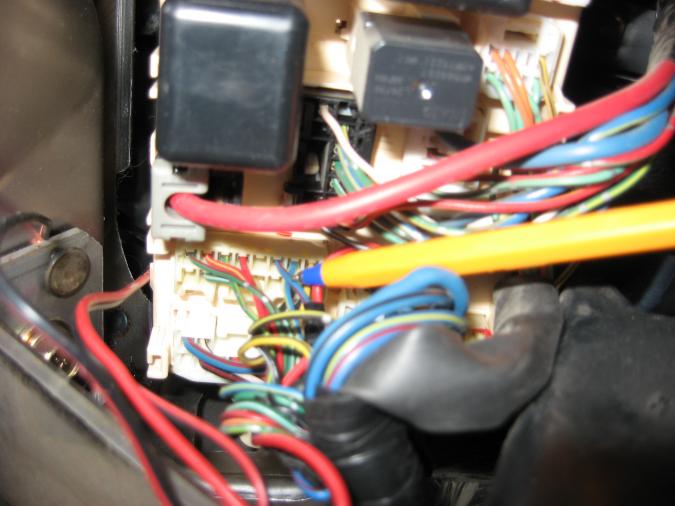
The bigger red cable, just behind the blue tip of the pen, is for the uhf (fuse box)
The antenna, Uniden AT 870.

The antenna cable access and bracket, make sure to thread the washer and the nut on the cable (and the cable in the bracket) all in the good order:)
It is wise to slightly shape the bracket before installing the antenna. It is hard to take it to the bench with the cable and antenna on it :)
The metal section of the modified ashtray (some grinding to remove part of the guiding rail)
The bracket of the uhf fitted on the metal part. The holes in the metal part is to screw it back in position (in the dash)
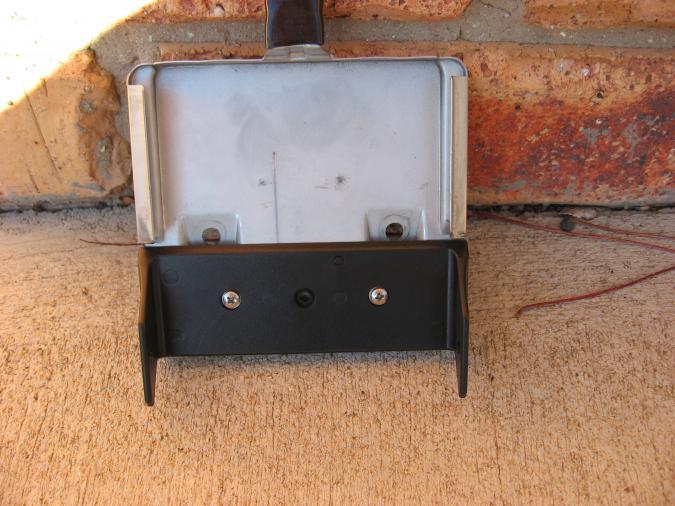
The "new" side screw, If the uhf is more inside, it will be harder to fit them. Black trim fitted after fitting the uhf. This leave plenty of space at the back for the fuse.
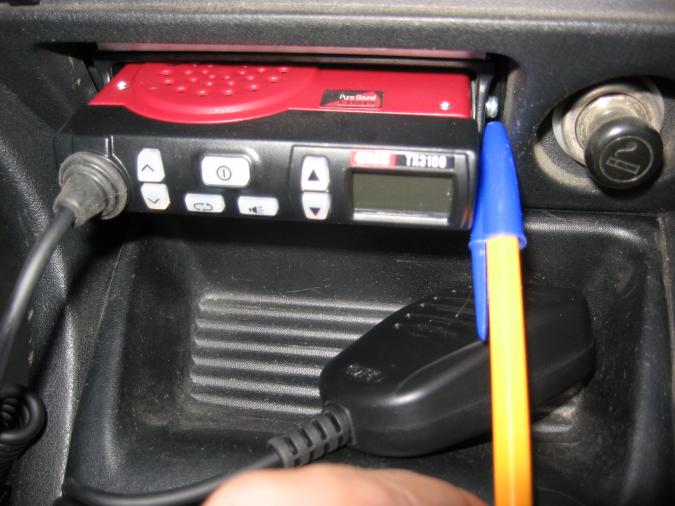
Finished, not sure where to put the microphone...yet (I don't like making holes in the plastic!)
Happy io
Yes
Yes, you are probably right, the speaker is not bad at all, and it would look better on the dashboard. If needed another speaker can be connected on the uhf, it does have a connection at the back just for that. The problem to fit it all inside (other than the speaker) is that the black bracket of the uhf would have been hiding the access of the fixation of the metal ashtray part, and it would have been very difficult to put the screw on the side of the uhf to hold it on its bracket. It is a little bit like a puzzle ! The way I have done the puzzle is removing the metal part, fix the uhf's bracket on it, install the metal part with the bracket attached to it back in position, then fix the uhf on the installed bracket. Maybe with a bit more thinking it can be installed all the way in.
Happy io
CV, Disc, brake pad and front bearing ....
I have been having a bit of noise from my adjustable plate's pillow bearing, nothing too bad, just annoying. This morning I decided to take it out and buy some new one on Monday. While removing the wheel I saw that my inner CV boot gave up, the disc are a bit worn and the front wheel bearing on his way out. Since my last couple of trip in the deep muddy pool, the front brake seems to be ...not as good...so I will buy new disc, bearing, pad, CV boot and seal for the CV, service the caliper (just a good clean and new grease, replace the brake fluid) and my $20 pillow bearing (on the top of the disc on the picture), all on both side of course !!
I have other car to use so plenty of time....I might get the disc and the bearing on ebay, not sure if I will get the http://www.ebay.com.au/itm/Mitsu-PAJERO-IO-SERIES-99-01-Front-Drilled-Slotted-RDA-Disc-Brake-Rotors-/380575652322?pt=AU_Car_Parts_Accessories&hash=item589c1399e2 or the cheaper one http://www.ebay.com.au/itm/Pajero-IO-Series-Standard-Front-Disc-Rotors-1999-9-2003-/290622868257?pt=AU_Car_Parts_Accessories&hash=item43aa790b21
Do I really need the drilled slotted disc? may be not...
And may be get this bearing http://www.ebay.com.au/itm/MITSUBISHI-PAJERO-io-QA-series-ONLY-06-00-03-PREMIUM-FRONT-1-WHEEL-BEARING-KIT-/360653916513?pt=AU_Car_Parts_Accessories&hash=item53f8a60961
Happy io

.
I am with you Fordem, I am pretty sure an IO cant get bogged. Claude must have a faulty one, haha.